Now that I’ve stockpiled 3 months’ worth of material from using our FoodCyclerTM, it’s time to figure out the best way to use it. At this time it’s become abundantly clear that these machines don’t make finished compost so, the question remains, what is the best way to make use of the nutrients we still have here? Hmmm, I think there’s more than one question remaining! One of my other big questions is: Does processing from an electric composter save any time for creating finished compost? In this article, I’ll explain my “4th-grade science-y” method to answer these and some other questions that keep nagging at me.
Here’s What We Already Know About Compost:
- Compost is a fantastic amendment to all of your outdoor gardens.
- Using composted, plant-based, waste at home is a helpful way to reduce global greenhouse gasses by keeping waste out of landfills and reducing methane concentrations.
- Compost requires four main components to work effectively: carbon-based material (browns), nitrogen-based material (greens), moisture and active organisms (worms, bacteria etc.).
- Composting in cold climates is challenging because many of the active organisms required either slow down.
Of course, there’s a lot more we know about compost on a technical level; maybe we’ll get into that another time.
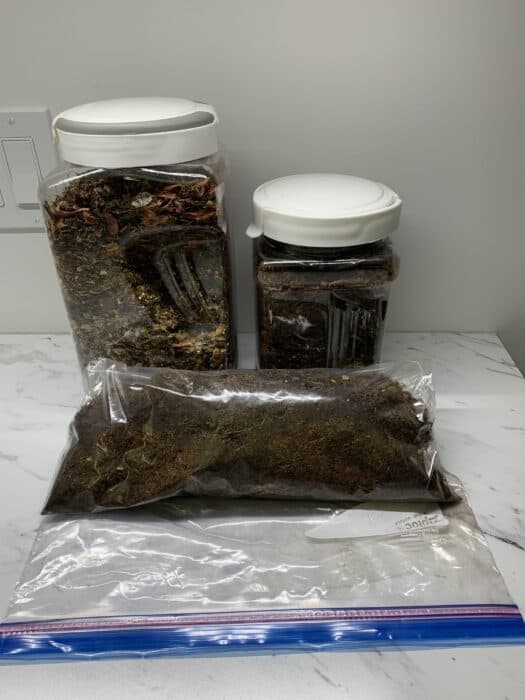
Here’s What We Already Know About Electric Composter Product:
- It is simply dry, ground plant material, lacking at least two of the 4 main ingredients for composting.
- It is not recommended that you apply it directly to active garden beds but you can add it to your garden beds a few weeks prior to planting.
- It can be added, like any other plant material to an existing compost system, thus finishing the compost process naturally.
But what if there’s a best way to use the electric composter product? That’s what I hope to discover with this experiment.
Setting Up My Compost Experiment
Hypothesis
Like any good scientific experiment, I’ll start with a hypothesis: Using the FoodCyclerTM in conjunction with traditional compost layering practices, with the addition of a compost starter, will produce the most nutrient-dense compost in the shortest amount of time. I expect this to be true as the compost starter will give the dried, ground product an accelerant to help make up the time used to reconstitute it, so it can be composted.
The Compost Experiment Method
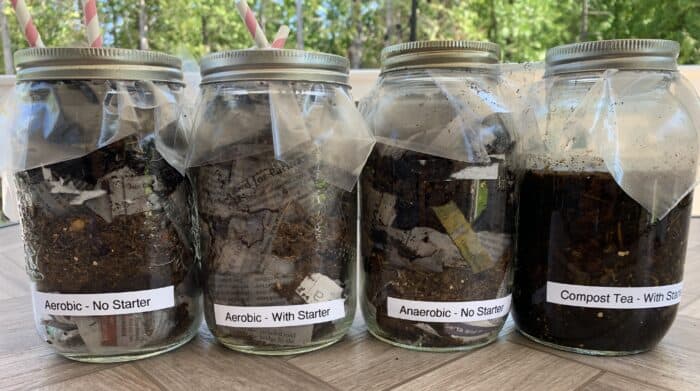
- I’ll set up 4 separate compost scenarios, using similar ingredients but different techniques:
- Aerobic – no starter
- Aerobic – with starter
- Anaerobic – no starter (to simulate Bokashi composting)
- Compost Tea – with starter
- Record observations/changes weekly.
- Once composting is complete (assuming a successful test here haha), mix the product with more topsoil at a ratio of 2 parts topsoil to 1 part compost. That ratio is a little more substantial than a regular amendment protocol but in such a small experiment, it sounds easier to achieve.
- Test for nutrients N-P-K using this home test kit that I purchased.
- Compare the test results with the same test on topsoil that has not been amended.
- Report findings & draw conclusions.
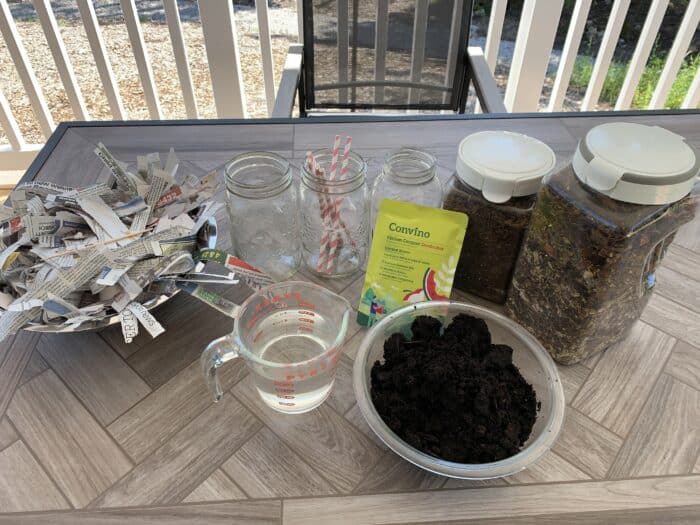
Look at me being all Grade 4!!! Gosh, I hope this works!
Setting up the Compost Experiment Scenarios
Below you’ll see what I’m putting into each compost experiment.
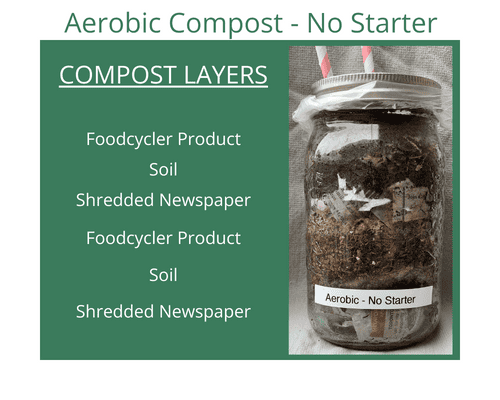
Compost Scenario #1 – Aerobic Composting Without Starter
| INGREDIENTS | – Glass jar – Newspaper – shredded – Bagged topsoil (because that’s all we have right now) – FoodCyclerTM product – 2 straws with holes cut in for aeration (hypothetically) – Water – Cover |
| LAYERING PROCESS | – Stand 2 straws in the jar. – Insert a small handful of shredded newspaper – Add a couple of handfuls of soil – Add a few handfuls of the FoodCyclerTM product – Repeat layers up to about 2” from the top of the jar – Add approximately ¼ cup of water. – Cover – allowing straws to stick out to allow air in while keeping other pollutants (and hopefully bugs) out. |
Compost Scenario #2 – Aerobic Composting With Starter
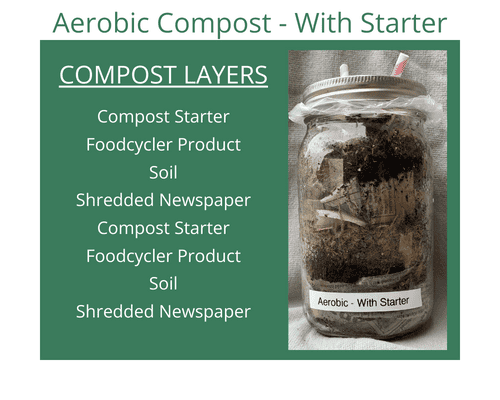
| INGREDIENTS | – Glass jar – Newspaper – shredded – Bagged topsoil – FoodCyclerTM product – Compost starter – 2 straws with holes cut in for aeration (hypothetically) – Water – Cover |
| LAYERING PROCESS | – Stand 2 straws in the jar – Insert a small handful of shredded newspaper – Add a couple of handfuls of soil – Add a few handfuls of the FoodCyclerTM product – A light sprinkle of compost starter – Repeat layers up to about 2” from the top of the jar – Add approximately ¼ cup of water – Cover – allowing straws to stick out to allow air in while keeping other pollutants (and hopefully bugs) out. |
Compost Scenario #3 – Anaerobic Composting Without Starter
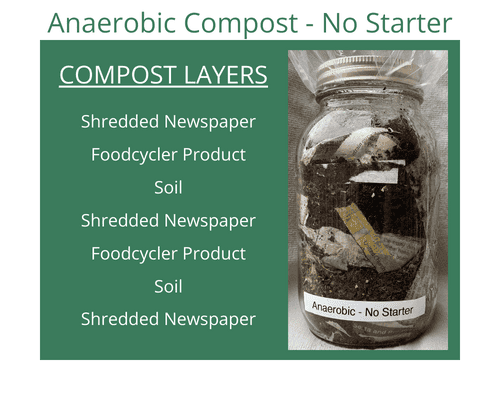
| INGREDIENTS | – Glass jar – Newspaper – shredded – Bagged topsoil – FoodCyclerTM product – Water – Cover |
| LAYERING PROCESS | – Insert a small handful of shredded newspaper – Add a couple of handfuls of soil – Add a few handfuls of the FoodCyclerTM product – Repeat layers up to about 2” from the top of the jar – Add approximately ¼ cup of water – Cover – securely |
Compost Scenario #4 – Compost Tea
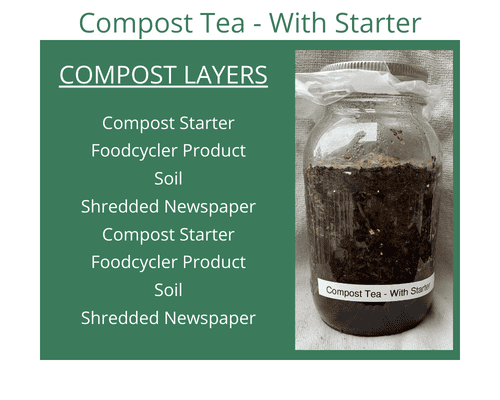
| INGREDIENTS | – Glass jar – Newspaper – shredded – Bagged topsoil – FoodCyclerTM product – Compost starter – Water – Cover |
| LAYERING PROCESS | – Insert a small handful of shredded newspaper – Add a couple of handfuls of soil – Add a few handfuls of the FoodCyclerTM product – A light sprinkle of compost starter – Repeat layers until jar is ½ full. – Fill with water up to 2” from the top of the jar – Cover and poke a few small holes in the cover to allow for some air to exchange. |
Once all 4 jars are set up, I’ve set them in a safe spot outside where they will get some morning sun but not too much throughout the day.
And now we wait! I hope I haven’t started this too late in the season; the nights are getting pretty chilly as September sets in. I’ll post my observations in this post as I go.
In the meantime, we’re building a real, full-sized compost area to take all this to the next level. More on that later too! You can either keep checking back, follow me on socials or subscribe to be sure you don’t miss a thing!
Recent Posts
7 Totally Selfish Reasons to Choose Native Plants for Your Gardens
Grab a cup (or glass) of your favorite beverage, and let's delve into what I’ve learned so far about why it's incredibly important and wildly selfish to embrace landscaping with locally native...
Exploring the differences, benefits and drawbacks of Broadcast Sowing and Frost Seeding for Native plants.
