I’ve often been curious about how a foundation can be built on rock and not move. Needless to say the foundation phase of our new build was one I’d been looking forward to with great curiosity. Fortunately I didn’t have to wait for long! Soon after the septic system was installed, Rick, the Foundation Supervisor at Quality Homes called to say that he had an opening in his schedule and would like to build our foundation. Perfect! Its time for more learning!
The Site Meeting & Layout
The first thing to do was to meet Rick on site to confirm a) that we were ready and b) to set the location of the foundation. Since the excavation was already complete, both of these items should be easy. We’ve already spent hours with painted rocks in the excavated area, setting, nudging a few inches this way and that, and nudging them again to make sure the house would be exactly where we wanted it. We also had some questions about drainage for the weeping tile and eavestrough around the house. We also had a chance to ask our BIG QUESTION: how does it stay in place on solid rock?! This seemed like the perfect time to get the answers.
When we arrived on site, Rick already had his pump running to remove some water that had accumulated in one corner of the excavated area. While we waited for the pump to do its job, we spent a little bit of time reviewing the progress to date, asking our questions about the drainage, and discussing the general position of the house.
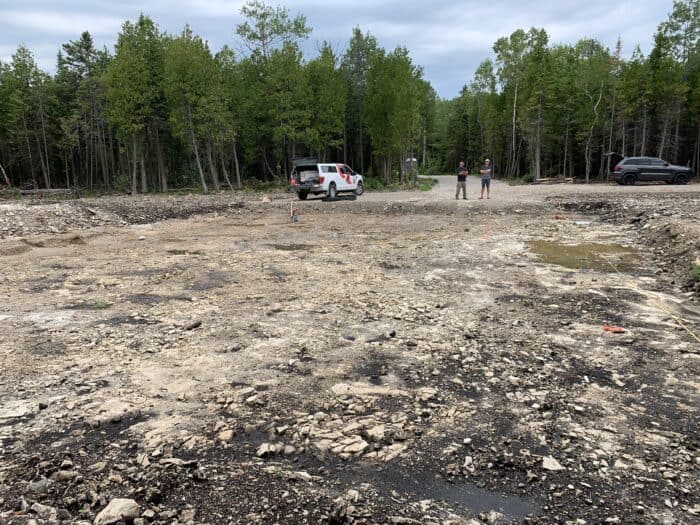
Then he started measuring and marking for the corners of the house. He called this “pinning the corners.” While doing that, he noticed that the excavation was a little close to one of the front corners. Before we called for a machine to come back for one little corner or make some fella do any digging by hand, we took a moment to check if we had space to shift the house or if we would need that corner excavated. Fortunately our lot is big, and our well was placed just far enough from the house that we could shift the foundation position without more excavation.
Tip: Excavate more than you think you need to so that you have room for adjustments if needed.
Once we had the position confirmed and our drainage questions answered, we left Rick to do his work undisturbed.
Footings
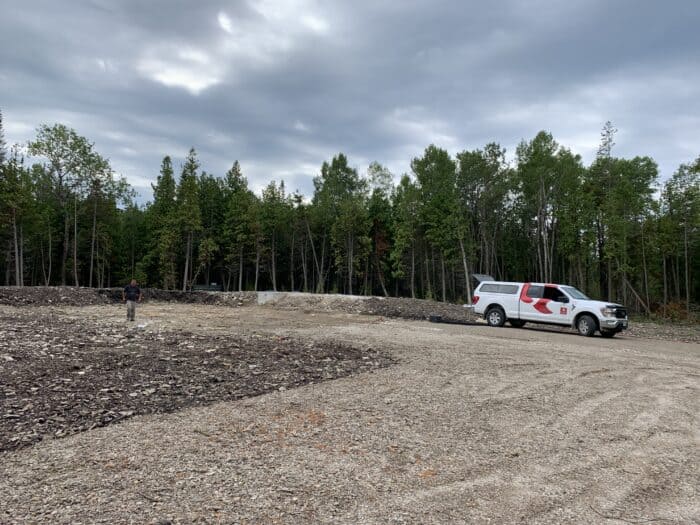
The next time we went up to see the property, the footings were complete. What we saw was:
- The gravel base
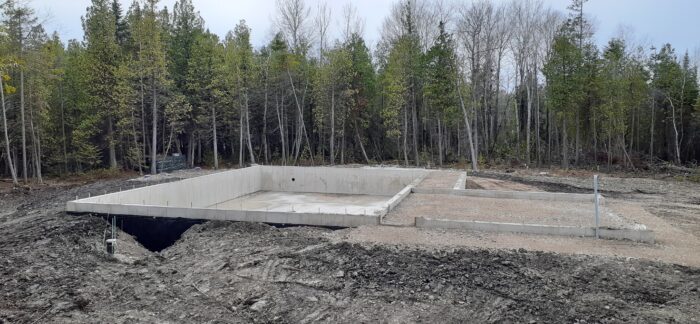
- The concrete outline of our foundation (the footing)
- The footings for the knee wall that will run down the centre of the foundation. This is the support zone for the marrying of the two modules.
- Ends of the weeping tiles set in gravel and the sump area.
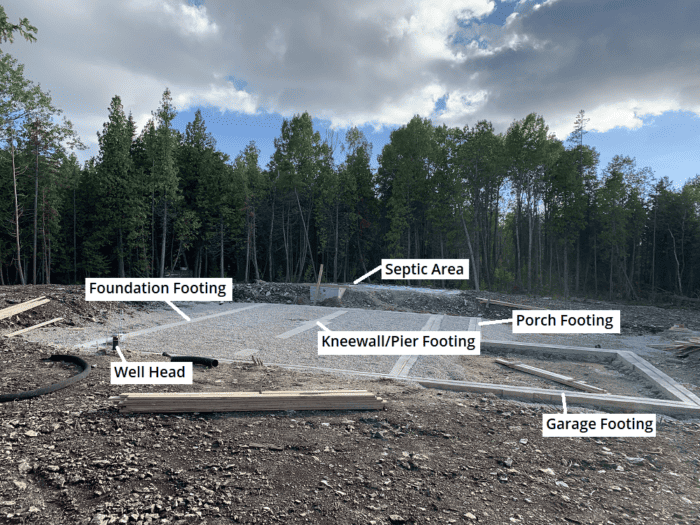
We had a small concern about the configuration of the weeping tile (now under stone) so we reached out to Rick to clarify that what was done was as we had discussed. I’ll post more about that another time. Rick quickly answered our questions and all was cleared up easily.
Another thing we noticed is that the outline of the house seemed so small! I’m not sure if it was the contrast of the clearing and the height of the trees or what but when we looked at the bare excavated area, the space looked huge – but for a 1400+ square foot bungalow, it seemed reasonable. Now with the footings to create the real footprint of the building, it seemed too small! We actually pulled our plans and a tape measure out to check! Of course it was correct and it was just our eyes that were tricking us I guess. Time to take a deep breath and trust the process.
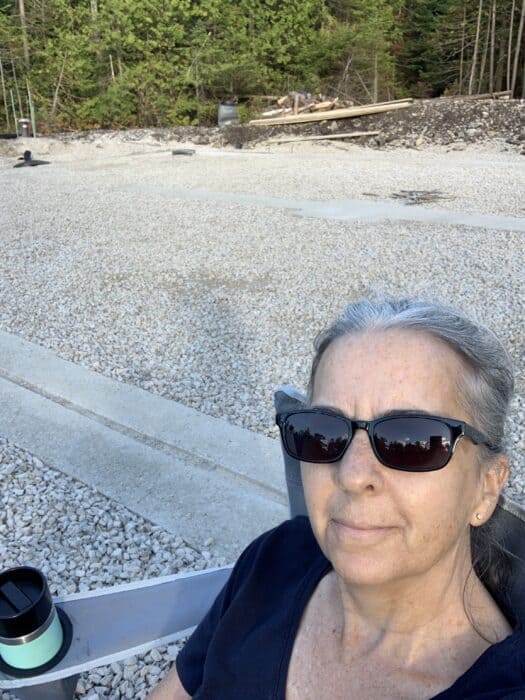
So, I grabbed my chair, put it within the outline of the porch and sat for a moment to imagine what it will be like to sit there in the evening to watch the sun set through the trees. Ahhh… bliss!
How does the foundation stay in place on rock?
Are you as curious as I was about how the foundation stays in place on rock?
There are two ways to secure foundation footings and their use depends on the type of rock you’re building on. On hard rock such as granite, a series of holes is drilled into the rock and lengths of rebar are placed in those holes; these are the pins. The concrete footing is then poured and incorporates those pins. Voila! The foundation footing is secured!
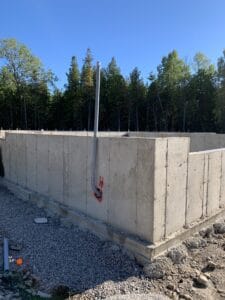
When the rock is softer, like dolomite or limestone, the surface area is naturally uneven and jagged, the concrete fills in the irregularities. The filling in of the irregularities is what locks the footings in place. This is the kind of bedrock we’re on; you can see it well in the picture above.
Foundation Walls
Just a few days later, we visited the lot again and were shocked to find the forms up. Well, we weren’t shocked that the forms were up were shocked by how huge they looked! Coming up the driveway we thought we’d need a ski jump to get into the garage!
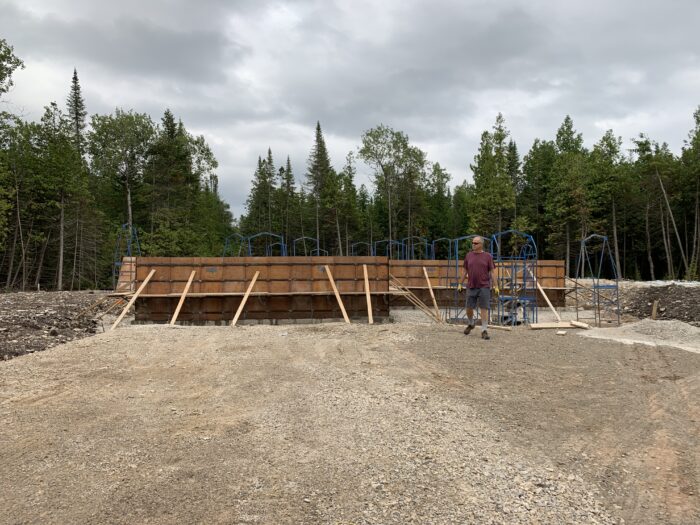
We took a deep breath, and got out of the truck to take a closer look. You can imagine our surprise not only to find that the forms were up but the foundation had been poured! Then the relief set in when we discovered that the wall didn’t come up to the full height of the forms. Soon we turned our attention to the area around the foundation … Oh Boy! We’re going to need a LOT of fill to make this look natural and not need steps the porch.
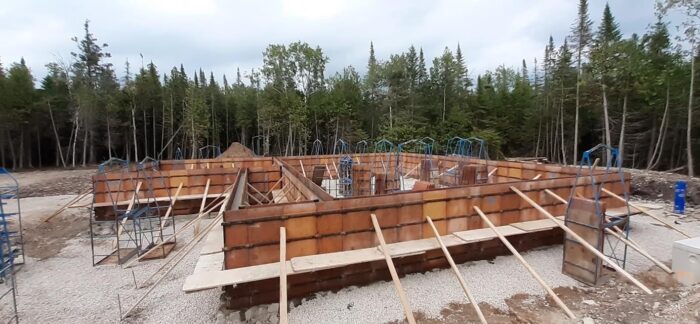
I think Brian might be secretly hoping for a “Dukes of Hazzard Ramp” into the garage though!

It’s funny how your perception of size shifts and warps going through the different stages of this foundation work. When we were at the footing stage, it looked too small but with the forms on it looked too big. Of course, deep down, we know that it’s just right!
Foundation Waterproofing
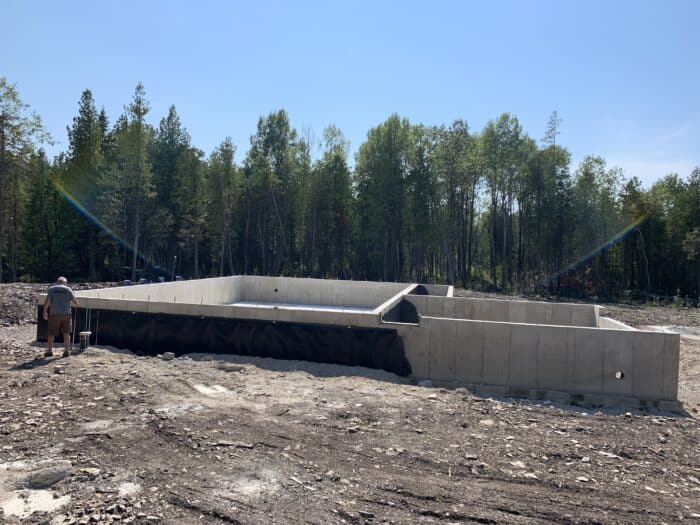
Soon we went back for another visit to see if any more progress had been made. The forms were off and we were able to see the placement of the garage and doors, and the water protection was on the exterior of the walls. We noticed that the plastic foundation wrap was only applied to the exterior walls of the living area. The wrap wasn’t applied to the garage or porch-side walls. Those walls received a coat of paint-on sealer even though the risk of water infiltration there is is quite slim.
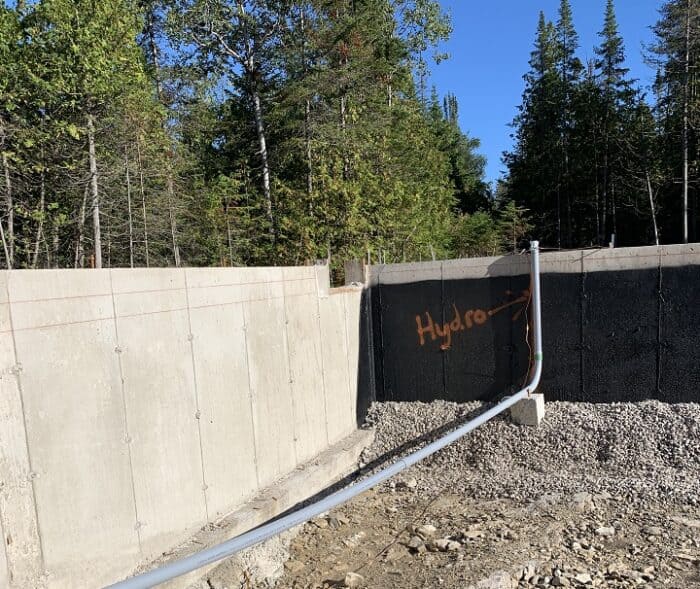
Then the hole was cut through the garage wall for the hydro line. Conduit was inserted and conduit to the interior garage wall where the hydro panel will be.
Backfill & Preparation for Garage and Porch Slabs
Now we’re ready for rough backfill to make the work area accessible and to fill in for the garage and porch slabs!
Before work was to begin, we had another site meeting with Underwood Construction to review the plans for grading, drainage and hydro trenching. This was an extremely valuable meeting because we thought more would be done at this stage than they would normally do at this stage. We had a great discussion about our vision, we received some expert suggestions and came to a solid plan. Then Brendon described his scope for the next week:
- Backfill the foundation to make it accessible for work crews
- Fill in the garage and porch areas with gravel and tamp them to prepare for the concrete slab floors
- Do a little trenching and attach some pipe to the end of the weeping tile to ensure water flows well away from the house.
I think we’re ready for a house!!!!
Recent Posts
7 Totally Selfish Reasons to Choose Native Plants for Your Gardens
Grab a cup (or glass) of your favorite beverage, and let's delve into what I’ve learned so far about why it's incredibly important and wildly selfish to embrace landscaping with locally native...
Exploring the differences, benefits and drawbacks of Broadcast Sowing and Frost Seeding for Native plants.

