What seemed like minutes after receiving our permits, I got word from our site contractor, Underwood Construction Ltd., that they had an opening in their schedule so they were going to install our septic system early. You’d think it would be hard to get excited about a septic install but … you’d be wrong! It felt like action, like progress and so it was totally exciting! I’ll warn you now, it all happened so fast that this might be a short post. 😄
Please note: I am by no means an expert on septic systems but my facts have been reviewed by our installer. Feel free to do your own research. You can start here for traditional systems or here for advanced systems. I highly recommend using your local septic system installer as your key resource; these professionals go through rigorous training and testing to do what they do and they have in-depth knowledge of the soil conditions in your area.
In Ontario there are 3 main types of onsite sewage treatment systems used:
1. Conventional Septic System
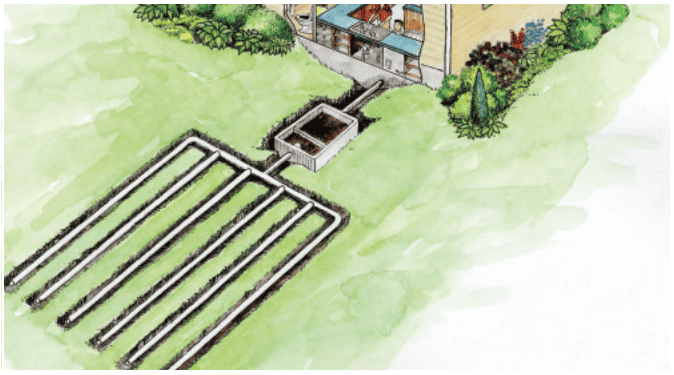
This is the most common installation using a tank & field system. Typically the tank has 2 chambers: solids settle in the first and liquids flow into the second. Here, smaller solids will settle. Once the liquids reach the outflow level, they are filtered and dispersed into the leaching field. (The effluent filter is now a requirement in Ontario.)
The leaching field (also known as the tilebed) is made up of a series of pipes laid on a bed with a combination of special sands and stone. The waste liquid seeps into the sand through perforations in the pipe and continues to be filtered here before being released into the environment to continue their journey through the water cycle.
The Conventional Septic System can be fed either using gravity or a pump system. When using gravity, the house/fixtures will have to be higher than the septic system so that the components naturally flow from one to the next stage. If your lot is too level, or if your home is lower than the area designated for the septic system, you’ll need a pump system to keep things moving in the right direction.
These systems typically require more space but they are generally more cost effective and require less maintenance than the alternatives.
2. Advanced Treatment Systems:
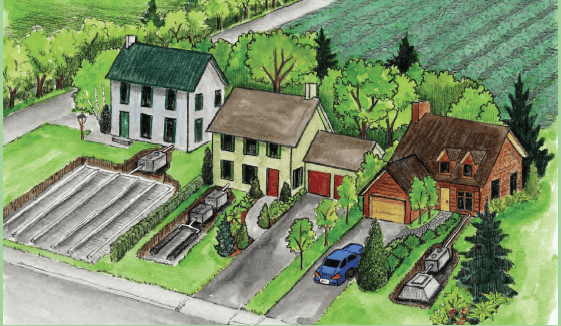
Where space or soil conditions don’t allow for a conventional septic system, an advanced treatment system (also known as tertiary treatment system) may be an option. These systems start with a tank similar to the conventional system. Effluent is directed through a secondary capsule or capsules containing peat, coco coir, foam or other media for filtering before release into a smaller dispersal field. Many advanced treatment systems require air to be pumped in to encourage bacterial growth and digestion within the system.
NOTE: There are a number of alternative systems available today. Others, such as rock-filter and shallow trenching may be available soon pending testing and approvals in many townships.
3. Holding Tank
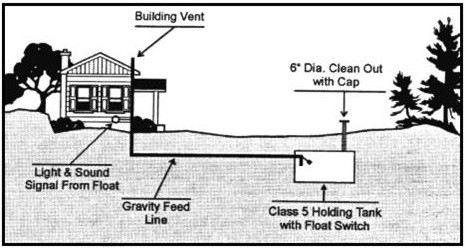
The third type of septic system is a classic holding tank system, also called “Class 5.” These aren’t common unless your lot is in an environmentally sensitive area or it’s too small for the other systems. A holding system relies heavily on regular pump-outs by a registered sewage disposal company.
Which On-site Sewage System Should You Choose?
Unless you have an attachment to a specific type of septic system, your licensed septic designer will assess your lot and recommend the best system to meet the needs of your new home. They’ll do some careful calculations to determine flow rates which the size of your system depends on. No matter how much you insist you conserve water, they are required to design the system based on maximum flow rates for the home. I think this is a very good thing; I’d much rather have a system sized ready for anything than have to deal with raw sewage either in my yard or backing up into my home!
Back to Our Septic System Installation!
When construction of our conventional septic system was scheduled to begin, I posted on my Facebook page that we were about to spend money on something we may never see again. Actually, we hope to never see it again! It’s funny because it’s true: a septic system is one of the big line items in our budget and if it’s constructed properly, and we take good care of it, it should last for years without trouble.
Stages of Construction for Our Conventional Septic System
- Using the site plan we submitted for permits, we had the topsoil & loose rock cleared to make way. We have only about 12-18″ of topsoil before hitting bedrock so that was a pretty quick job.
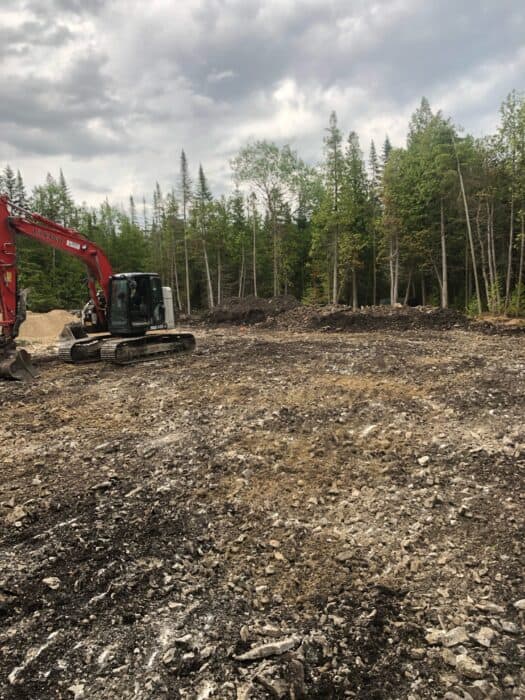
- Then the tank was placed. We opted for a low profile tank; it takes up a bit more space but doesn’t need as much grading at the end. This means that we won’t have an obvious hump out in our yard when the final grading is complete.
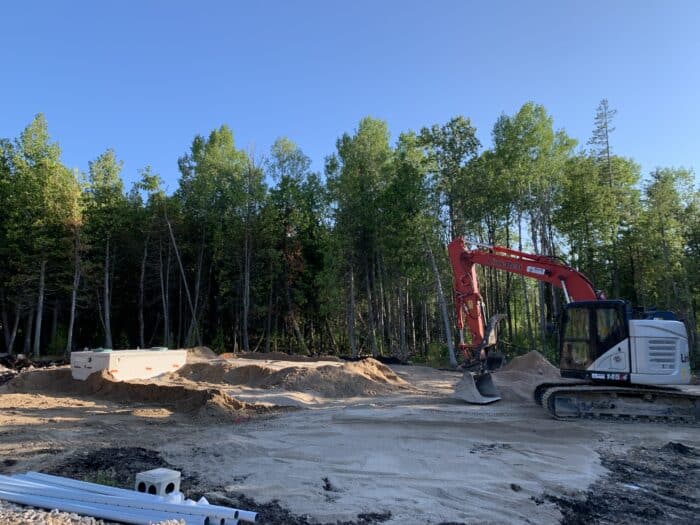
- Tilebed sand is spread and properly graded
- Engineered aerobic sand is placed. This is clean sand that is regularly tested for percolation rates and quality. Our contractor will have to provide proof of purchase and the latest test documents from the supplier. This layer really matters because this is the stuff that filters the effluent before releasing it back into the hydro cycle.
- Pipes for the tilebed are placed and secured with more clean aggregates. The contractor has to provide documentation for this product too.
- Filter cloth is placed on top of the stone to keep soil and other organic’s out of the system when the final grading is done and metallic tape is then laid along the pipe locations so they can be located later if needed.
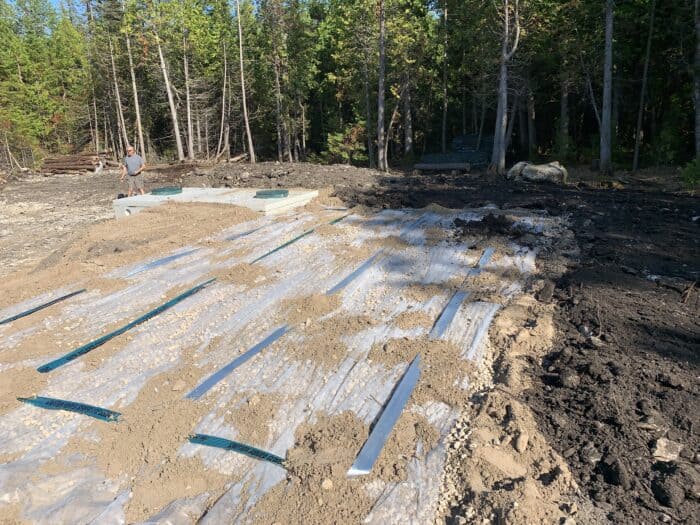
- Rough grading is done making our system as completely installed as possible for now. Grass seed or sod will be installed later when the final grading is done for the house. It will be winter by the time we’re ready for that, so I guess it will be a busy spring next year!
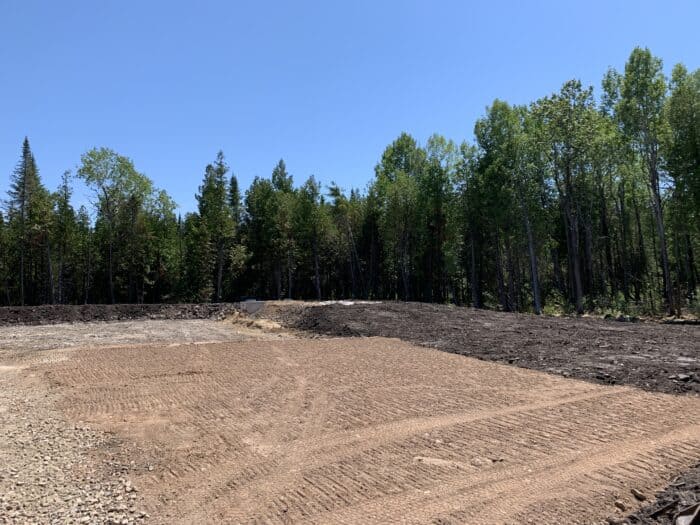
Driving up to the lot after work on the day the septic install was completed, we weren’t really sure what we’d find. I was pretty sure it would look strange because there’s no house there for a system to connect to. Beyond that though I had no idea what to expect. We were pleasantly surprised! Not only that it was complete but because the build area was ready for the foundation and basic grading had been completed.
Now we have a better visual of what the grading will look like – and it’s LOVELY! Of course I might be a little biased, but we’re so happy to have Underwood Construction working with us. With so much work to be done, and so many moving parts to manage (weather, Quality Homes, as well as other contractors and customers) the communication can get a little rocky, but I’ve never worried, and I’ve not been disappointed.
I’ll be circling back to the septic system in a future post but if you need information about taking care of your on-site sewage system investment now, read this article on the Underwood Construction Website.
Recent Posts
7 Totally Selfish Reasons to Choose Native Plants for Your Gardens
Grab a cup (or glass) of your favorite beverage, and let's delve into what I’ve learned so far about why it's incredibly important and wildly selfish to embrace landscaping with locally native...
Exploring the differences, benefits and drawbacks of Broadcast Sowing and Frost Seeding for Native plants.

