Not long after the first hints of spring arrived, we received a surprise email from Quality Homes telling us it was time to come in and make our selections. I say it was a surprise because we weren’t expecting this until much closer to our planned delivery in December. We also received an email with the presentation set of blueprints for the build!
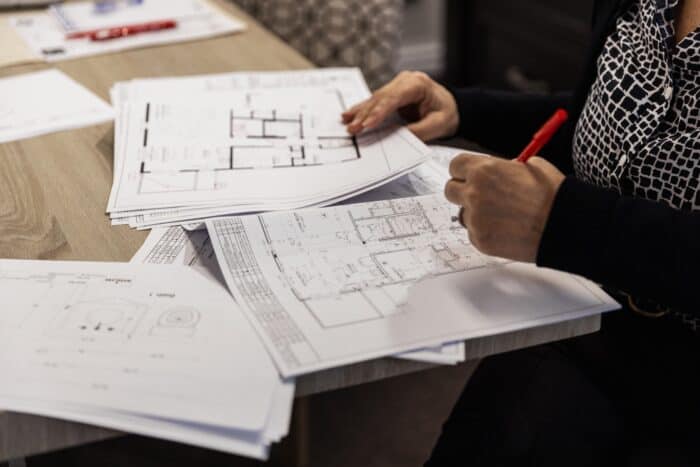
Suddenly all the ideas in our head could become real choices! My favorite part of the drawing package was the exterior rendering. OH and the kitchen rendering. It’s even better than I had imagined! Even the electrical plan was exciting to me. We poured over the plans for hours up to our Personal Selection Day. We made notes about possible changes and lots of questions. Thankfully we didn’t find any big changes to be made.
To prepare for our Selection Day, we were given a small PDF “catalogue” to help us get an idea of the base choices available to make our selections from. I also went online and watched this video and this video from the Quality homes webinar series. Have I mentioned they have a great webinar series on YouTube? You should check it out! Anyway … a date was set; we didn’t have to wait long because it was only a few weeks away.
In this post I mentioned that I wished QH had a customer portal so we could explore our choices a little more in depth to better prepare for our day. I still think it would have helped speed things along – considering the number of choices to be made in a day BUT the document they sent was certainly helpful. It allowed us to see how many of the base choices would be perfect for us and we were also able to get an idea of things we might need upgrades on. Here’s how our day went …
Our Personal Selection Day
Our day started different from most because we were asked if Quality Homes could interview us about why we chose them to build our home, and our experience so far. Of course we said yes, and we had a great time doing it. I’m sure I’ll let you know when they post anything from it – that is if they find they’ve captured any valuable content hahah.
Once the interview and a few “money shot” stills were taken, we walked through a couple of their model homes to get our creative juices flowing and to get a better look at the crawl space hatch. I know it’s a little thing but it’s a big thing too. One, of the decisions we had to firm up was the location of the hatch to our crawl space. In order to make that decision we needed a better understanding of how it was constructed and what it would be like if we had to step on it regularly. After checking it out, we did move it from the placement in the original plan.
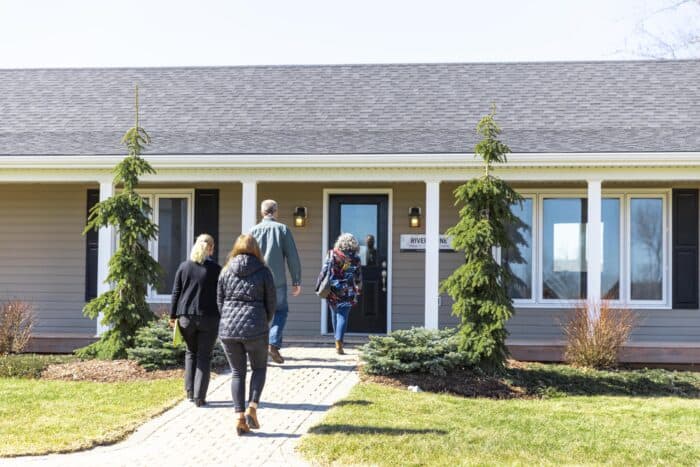
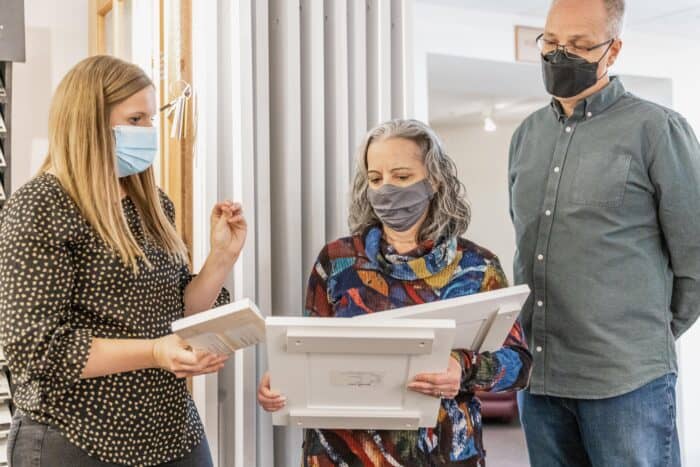
Then we went to the design centre and got to work! Even though we had done our homework and made some pre-selection choices, we took a few extra minutes on the big items to be sure of our decision. Things often look much different in real life than they do in print so this was a necessary step.
Flooring
We opted for vinyl plank throughout. We love a consistent floor and vinyl plank allows us to carry it right through to the bathrooms since its water resistant.
Cabinets and Countertops
I just love a white kitchen! And I had no idea how many shades of white are available! We must have run up and down the stairs a dozen times with samples to see the choices in daylight. This is one of the elements you definitely don’t want to get wrong as kitchen renovations can be costly down the road. We opted for white cabinets, marble-look laminate counter top and black hardware. I think with this combo we can play with colour in our accessories for a long time.
The flooring, cabinetry and countertops took the most time for us to select simply because we wanted to be sure we’d gotten it right.
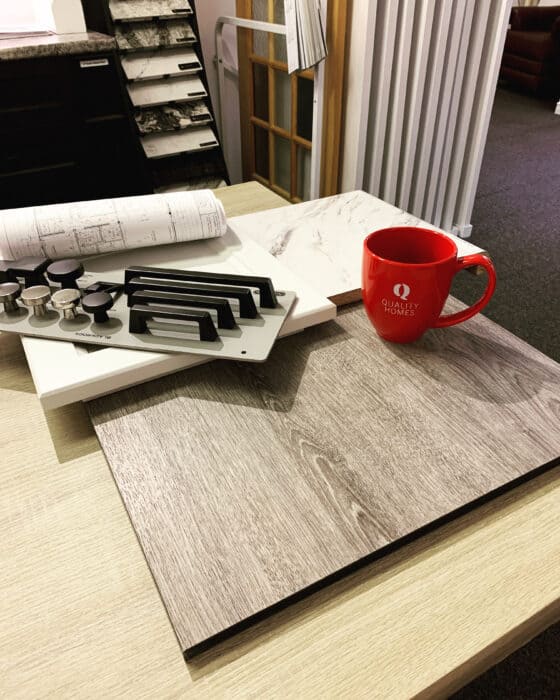
Why did we choose, laminate over hard/stone surface for the countertop? There a few reasons.
- I actually prefer laminate for the durability and sound qualities. Plus it’s hard as nails as long as you protect it from heat.
- There are some lovely colours, designs and finishes available in laminate these days. We requested squared edge and backsplash removed to give it a more modern finish.
- Cost – The price of laminate was already in the cost of the build so we were able to avoid an upgrade charge. Laminate is also fairly easy to replace if we choose to do that down the road.
What about the backsplash? After much time flipping through boards and boards of tile options, we chose… nothing! In our recent DIY kitchen renovation we installed our own backsplash and we love it. We’re confident we can do that again easily. Plus, it allows us the chance to put a little effort into our home to make it … home.
Plumbing Fixtures
These are easy to replace on our own, yet we chose to select slight upgrades through the builder. They had good options and very good prices so that was a no-brainer. We upgraded the kitchen and bathroom sink faucets only. The tub and shower fixtures we kept at the base selection level.
Lighting
This was the only element where I was a little disappointed in the builder options. Basically there were no choices within the base selection and no option for upgrades. Luckily Brian can change lights out easily so it’s not a big hardship going with the stock lights. Actually this gives us the chance to get in there, live with the place for a while to determine the style we most want. And who knows, maybe the stock lights will end up being just fine anyway! We did remove the fixtures in two of the three bedrooms and got rough-ins for fan lights instead. In retrospect we probably should have done that in all three bedrooms.
Exterior Selections
I think the exterior of the home was where we spent most of our upgrade budget. We didn’t do very much but it added up quickly!
- After taking our top two siding options within the included package outside to check in the daylight, ensuring we checked them in the sun and in the shade, we were able to easily make our selection.
- Added frieze board accents at the garage and front peaks
- Increased the size of the corner pieces and front trim
- Upgraded the front door hardware but stayed with standard lighting options.
All in all it was a very exciting and exhausting day. We were pretty quiet on the way home – I guess we were talked out. At one point we all worried that we wouldn’t get it all done in one day but we made it through. I can’t believe that Diane (Sales) and Melinda (Design & Décor) go through that several times a month! They sure put on the miles getting products and updated budget numbers to us constantly through the day. They must train like marathoners!
What I liked about our Personal Selection Day
- The team work – Melinda and Diane helped us through some of the tougher choices with style advice and ideas from what others have
- Methodical process – We were kept on task and worked our way throughout the home, making choices from biggest (flooring) to smallest (lights). And I love that with every change we received an updated budget so we could keep track.
- I still love the thought that it’s all done in one day. Overall, it was super fun and exciting the best kind of exhausting – day.
What I didn’t like about our Personal Selection Day
There’s only one thing I didn’t love about the day, and I know this is me being totally picky but … putting a lot of their design centre in a dimly lit basement causing us to run up and down stairs to see how things would look in daylight, and the rest of the selections in a crowded room, was a bit of a bummer. Everything look else about our Quality Homes experience has been so top notch that it’s a sad surprise that they missed putting the design centre in a well-lit, open space.
All in all though, it must have been a completely engaging day, so much so that I completely forgot to take pictures! Even knowing I was going to be writing this post, I took a whopping total of 2 pictures (of the same thing) all day. Thank goodness the Quality Homes crew was around to help rescue this post from being text, and stock photos only!
Hint! If photo documentation of your Personal Selection Day is important to you, keep your phone/camera in your hand as a cue!
Preparing for Your Personal Selection Day.
This post wouldn’t be complete without a little advice so here it goes ….
I mentioned in this post that I was a little concerned that the day could be overwhelming. Of course it could be! That’s a lot of decisions – very import decisions – to be made in one day. The only way I know to stave off anxiety and overwhelm is to be prepared. Here are our best tips for preparing for your Personal Selection Day with your builder:
1. Discuss over-all style vision with your partner.
Luckily, Brian and I have similar tastes as far as colours and décor go, so most of this discussion was easy. Having these discussions early will help curb any awkward moments in front of in your builder.
2. Pre-select as much as you can.
If the builder provides any information in advance like Quality Homes does, discuss them and pre-choose your top choices. Of course this doesn’t mean you can’t change your mind when you get there but it’s likely to make the day-at least a bit less overwhelming. It will also save time on your selection day. Can you imagine how long it would take to make all the decisions for your home in one day with long discussions and debates for every element? Yikes!
3. Discuss what’s worth upgrading and what’s not worth it.
There are a lot of big ticket elements that can go into a build. Many of these are difficult to change after the fact. For example: have you ever installed new flooring in a home while you’re living in it? We have, multiple times, and we don’t want to do it again! So that would be one upgrade we would consider if Quality Homes didn’t already have so many great options in their base level package. Base package lighting, cabinetry knobs and handles, door hardware and sink faucets may not be great upgrade choices through your builder because you can get these item’s easily in retail outlets and replace without too much trouble. It’s a good idea to shop any upgrades you’re considering so you can make a quick choice between the builder upgrades and the store. Sometimes it just as easy to get the builder to put it in now and save you the hassle later – like we did with the faucets.
4. Make a budget for upgrades!
Seriously you could go crazy in the selection centre/showroom. Your builder can make your every Pinterest dream come true! So, unless you have a very generous bank-roll, I suggest you set a budget for upgrades. Take your time to work through the big ticket items you might want to upgrade, such as: brick, stone or siding, fireplaces/feature walls, hardwood or ceramic flooring, custom cabinets (appliance lifts, special spice drawers etc.) and even the kitchen sink. These are just some of the things that can have a big impact on your build budget. Determine the aspects that are most important to you, and the things you’re willing to flex on before you get there.
5. Keep your home’s value in mind.
This sort of goes with #4 but deserves its own spot. No matter what you’re building or where, you don’t want to spend more than you’d ever get out of the place. If you’re like us, you’re building this home as a “forever home” but some day, one way or another, this home will go up for sale. You’ll either want to get as much as you can out of it to fund your next stage, to leave a nest-egg for your children, or to leave a legacy for a cause close to your heart. With that in mind, choose your finishes so you can get the highest future value from your choices today.
6. Make a list of any remaining plan edits and questions.
Go through your drawing package carefully and be sure any outstanding questions or changes get addressed on your selection day. This is the day when your build price is finalized and changes after can be costly.

Conclusion
This is the point where things really get real. Those images you have in your head, and saved on your Pinterest board start to make their way into your home. We hope you enjoy every minute of it!
Recent Posts
7 Totally Selfish Reasons to Choose Native Plants for Your Gardens
Grab a cup (or glass) of your favorite beverage, and let's delve into what I’ve learned so far about why it's incredibly important and wildly selfish to embrace landscaping with locally native...
Exploring the differences, benefits and drawbacks of Broadcast Sowing and Frost Seeding for Native plants.

